A snapping drill bit is one of the most frustrating experiences in any workshop. It wastes time, wastes money, and if the broken end is stuck in your work piece it can ruin the entire job. Worse — a bit that snaps under load can send fragments flying at dangerous speeds.
The good news is that drill bits almost never break randomly. There is always a specific cause — and once you understand what causes bits to break you can eliminate the problem entirely. This guide covers every cause of drill bit breakage, practical fixes for each one, and an interactive diagnostic tool to help you pinpoint exactly what is going wrong with your setup.
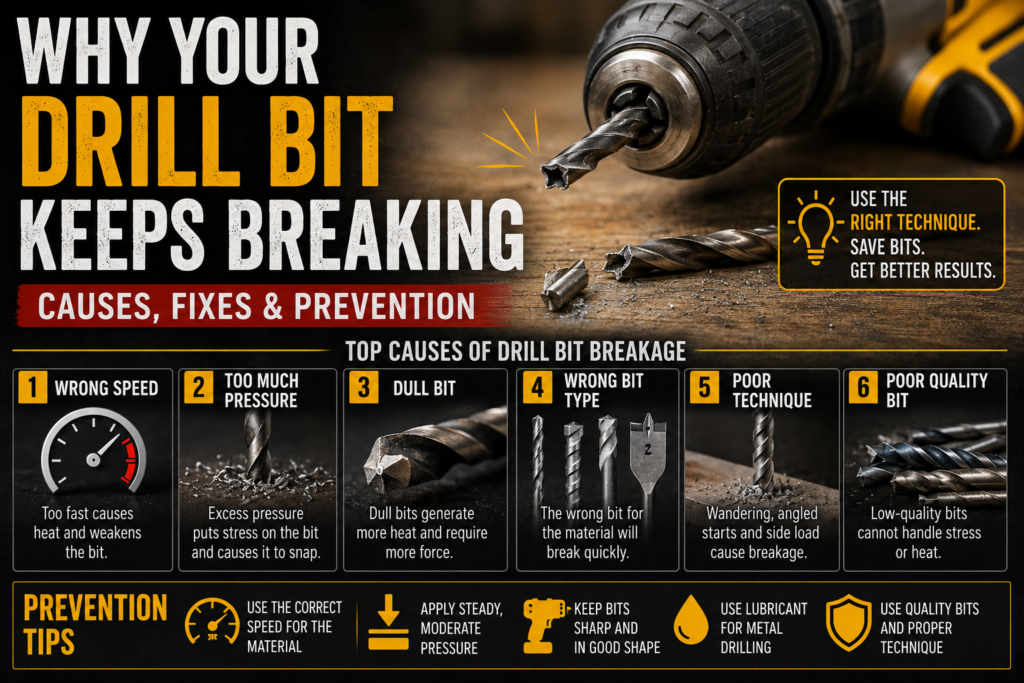
The Most Common Causes of Drill Bit Breakage
1. Wrong Speed for the Material
Speed is the most common cause of bit breakage — and the most misunderstood. Most beginners assume faster is better. For most materials the opposite is true.
High speed drilling generates heat. Heat weakens the metal of the bit. In hard materials like steel and masonry the heat builds so quickly that the bit’s temper is destroyed — it becomes soft and brittle and snaps under load. In wood, high speed is generally fine but can cause burning and rough holes. In metal, always slow down.
| Material | Correct speed | What happens if too fast |
|---|---|---|
| Softwood | High (gear 2) | Burning, rough hole edges |
| Hardwood | Medium (gear 1 or 2) | Burning, bit wanders |
| Thin metal sheet | Medium-low (gear 1) | Bit grabs, snaps on breakthrough |
| Thick steel | Low (gear 1, slow speed) | Overheating, bit softens and snaps |
| Stainless steel | Very low with cutting fluid | Work hardening, immediate bit failure |
| Tile / ceramic | Low, no hammer mode | Tile cracks, diamond tip destroyed |
2. Too Much Pressure
Forcing the drill bit into the material with excessive downward pressure is the second most common cause of breakage — particularly for small diameter bits. The bit flexes slightly under sideways load. When you apply too much pressure the flex exceeds the metal’s tolerance and the bit snaps, often with a sharp crack.
The correct approach is to let the bit do the work. Apply steady, moderate pressure — enough to keep the bit cutting but not so much that the drill slows noticeably under the load. If the drill is slowing dramatically you are pushing too hard or the bit is dull.
3. Dull Drill Bit
A dull bit requires more pressure to cut, generates more heat, and is far more prone to wandering and snapping than a sharp one. Most beginners continue using dull bits long past their useful life because dullness develops gradually and is hard to notice until the bit fails.
Signs of a dull bit:
- Drill slows significantly under normal pressure
- Bit squeaks or generates excessive heat
- Hole edges are rough or torn rather than clean
- You need to push noticeably harder than when the bit was new
Small drill bits (under 4mm) are generally not worth resharpening — replace them. Larger HSS bits (6mm and above) can be resharpened with a bit sharpener or on a bench grinder if you have the skill.
4. Wrong Bit Type for the Material
Using the wrong type of bit for the material is a guaranteed way to break bits repeatedly. Every material requires a specific bit geometry and material composition:
| Material | Correct bit type | Never use |
|---|---|---|
| Softwood / hardwood | HSS or wood brad point bit | Masonry bits |
| Steel / iron | HSS or cobalt bit | Wood or masonry bits |
| Stainless steel | Cobalt bit with cutting fluid | Standard HSS bits |
| Concrete / masonry | Carbide-tipped masonry bit | Any other type |
| Ceramic / porcelain tile | Diamond-tipped tile bit | Standard HSS or masonry bits |
| Glass | Diamond or carbide spear point | Any standard bit |
5. No Cutting Fluid on Metal
Drilling steel without cutting fluid is one of the fastest ways to destroy bits. Cutting fluid serves two purposes — it lubricates the cutting edge to reduce friction, and it carries heat away from the bit. Without it, heat builds at the cutting tip within seconds, the steel softens, and the bit either dulls immediately or snaps.
Any cutting fluid works — dedicated cutting oils, WD-40, even a drop of motor oil in an emergency. Apply a small amount to the drilling point before starting and reapply every 30 seconds during extended metal drilling sessions.
6. Bit Not Secured Properly in Chuck
A bit that is not fully tightened in the chuck wobbles under load. The wobble creates side loads on the bit that it is not designed to handle. Small wobbles are almost invisible to the eye but large enough to cause fatigue fractures in the bit over multiple holes — eventually snapping it mid-drill.
Always tighten the chuck fully — three-jaw chucks should be tightened at all three positions around the chuck for even gripping. If your drill has a keyed chuck, use the key. If keyless, grip the chuck ring firmly in both hands and tighten with a solid twist.
7. Drilling at an Angle
Drill bits are designed to cut straight ahead along their axis. Any sideways angle applies bending stress to the shaft. The smaller the bit the more vulnerable it is — a 2mm bit snaps almost instantly if drilled at even a slight angle. Always keep the drill perpendicular to the work surface and use a drill guide for critical perpendicular holes.
8. Hitting Hidden Obstacles
Nails, screws, aggregate in concrete, wire, and other hidden materials cause sudden extreme resistance that snaps bits instantly. Always use a stud finder and cable/pipe detector before drilling into walls. In concrete, aggregate pieces can cause sudden shock loads even with the correct masonry bit — reduce speed and pressure when drilling to minimise impact.
9. Using Cheap or Low Quality Bits
Budget drill bit sets from unknown brands are often made from low-grade steel with inconsistent heat treatment. They break at a fraction of the load that quality bits handle. According to This Old House, quality bits from brands like DeWalt, Makita, Bosch, and Milwaukee outlast cheap alternatives by a factor of 5 to 10 in typical use. Investing in a quality bit set is far cheaper long-term than repeatedly replacing budget bits.
10. Using an Impact Driver Instead of a Drill
Impact drivers deliver rotational force in rapid hammering bursts. Standard round-shank drill bits are not designed to handle these shock loads. Using a standard bit in an impact driver causes rapid fatigue failure — the bit typically snaps after just a few holes. Always use only hex-shank impact-rated bits in an impact driver. For drilling holes use a cordless drill, not an impact driver. For a full explanation of the difference read our Impact Driver vs Drill guide.
The following tool might help you.
🔍 Drill Bit Breakage Diagnostic Tool
Select what is happening and get the most likely cause plus the fix.
Specific Situations and Fixes
Bit Snaps Just as It Breaks Through
This classic failure happens in metal when the bit catches on the exit hole edge as it breaks through. The bit grabs, twists, and snaps in an instant. The fix: reduce pressure significantly as you feel the bit approaching breakthrough. Better yet, clamp a backing piece of scrap wood or metal behind the work — the bit exits into the backing rather than grabbing on the edge.
Bit Snaps in Small Diameter Holes
Small bits (under 3mm) are extremely fragile. Even slight angular deviation or momentary wobble breaks them. Use a centre punch to create a starting dimple before drilling — this stops the bit from wandering on entry. Apply the absolute minimum pressure and use the slowest possible speed. A drill press is far preferable to a handheld drill for very small precision holes.
Masonry Bit Wears Out Rapidly
This usually means you are drilling without hammer mode, the bit tip is worn, or you have hit reinforcing steel. Always use hammer mode for concrete. If the bit is blunt replace it — masonry bits cannot be effectively resharpened at home. If you hit rebar stop immediately and use a specialist rebar cutter or change approach entirely.
Bit Overheats and Discolours
Blue or brown discolouration on an HSS bit means the steel has been overheated and its temper destroyed — the bit is now soft and will break easily. This happens most commonly when drilling steel without cutting fluid at high speed. The fix is to discard the discoloured bit and start fresh with lower speed, more cutting fluid, and less continuous drilling time.
🔍 Drill Bit Failure Diagnostic Tool
Select what is happening with your drill bit and get a specific cause and fix.
Prevention Checklist
| Before drilling | Why it matters |
|---|---|
| Select the correct bit type for the material | Wrong bit type is the most common cause of immediate failure |
| Check bit sharpness — replace if dull | Dull bits need more force which increases breakage risk |
| Tighten chuck fully at all positions | Loose bits wobble and fatigue under load |
| Set correct speed for material | Wrong speed causes overheating and breakage |
| Use centre punch for metal drilling | Prevents bit wandering on entry which causes angled stress |
| Apply cutting fluid for metal | Prevents heat buildup that destroys bit temper |
| Check for hidden obstacles | Hitting nails or rebar causes instant breakage |
| Use a cordless drill — not an impact driver | Impact forces destroy standard round-shank bits rapidly |
For guidance on choosing the right drill for your work read our Complete Drill Buying Guide. To understand how torque and speed settings affect drilling performance read our Torque vs Speed guide. For drill comparisons by brand read our DeWalt vs Makita Drills comparison.
Frequently Asked Questions
Can I reuse a drill bit that has snapped?
Only if a significant length remains usable. A snapped bit has a fresh cutting edge at the break point but the geometry is no longer correct. For small bits this rarely leaves enough usable length. For larger bits the snapped end can sometimes be reground on a bench grinder by someone with the skill to restore the correct cutting angle. In most cases replacing a snapped bit is more practical than attempting to restore it.
Why do my bits keep snapping in hardwood but not softwood?
Hardwood is significantly denser and more resistant than softwood. It requires more torque to cut, generates more heat, and puts more stress on the bit. Common fixes: reduce speed, use a sharp high-quality HSS bit, pre-drill a smaller pilot hole first, and apply moderate steady pressure rather than forcing the drill. If bits snap consistently in hardwood consider upgrading to cobalt-tipped HSS bits which handle hardwood better than standard HSS.
How often should I replace drill bits?
There is no fixed interval — it depends entirely on use. Replace bits when they show signs of dullness (squeaking, burning, requiring excessive pressure) or visible damage (chipped tip, bent shaft, discolouration). For a home user occasional bits can last years. For professional daily use the same bit might need replacing after a few weeks. Keeping a stock of commonly used sizes and replacing proactively is better than discovering a dull bit mid-job.
Is it safe to drill out a broken bit stuck in my workpiece?
It depends on the material and how deeply the bit is embedded. In wood, a screw extractor or left-hand drill bit can often remove a broken HSS bit. In metal this is more challenging — the broken bit is often harder than the surrounding material making it very difficult to drill through. In some cases the only option is to grind down past the broken piece or abandon that location and drill adjacent to it. Always wear eye protection when attempting to remove broken bits.
Why does my bit smoke when drilling into hardwood?
Smoking indicates the bit is overheating due to friction. Common causes: dull bit, too much speed, forcing the drill, or not clearing chips from the hole. Fix: withdraw the bit periodically to clear chips, reduce speed to gear 1, apply light cutting oil even in wood for extended sessions, and replace the bit if it continues smoking with fresh technique.
Specifications
Estimate runtime (calculator)
Use battery capacity (Ah) × battery voltage (V) and tool power (W) to estimate runtime.