Curious about “How to Remove a Stripped Screw?” A stripped screw is one of the most infuriating problems in any workshop or home repair job. The driver spins uselessly in the head, each attempt making the damage worse, and the screw will not budge. It feels like a dead end — but in almost every case there is a reliable method that will get the screw out without destroying the surrounding material.
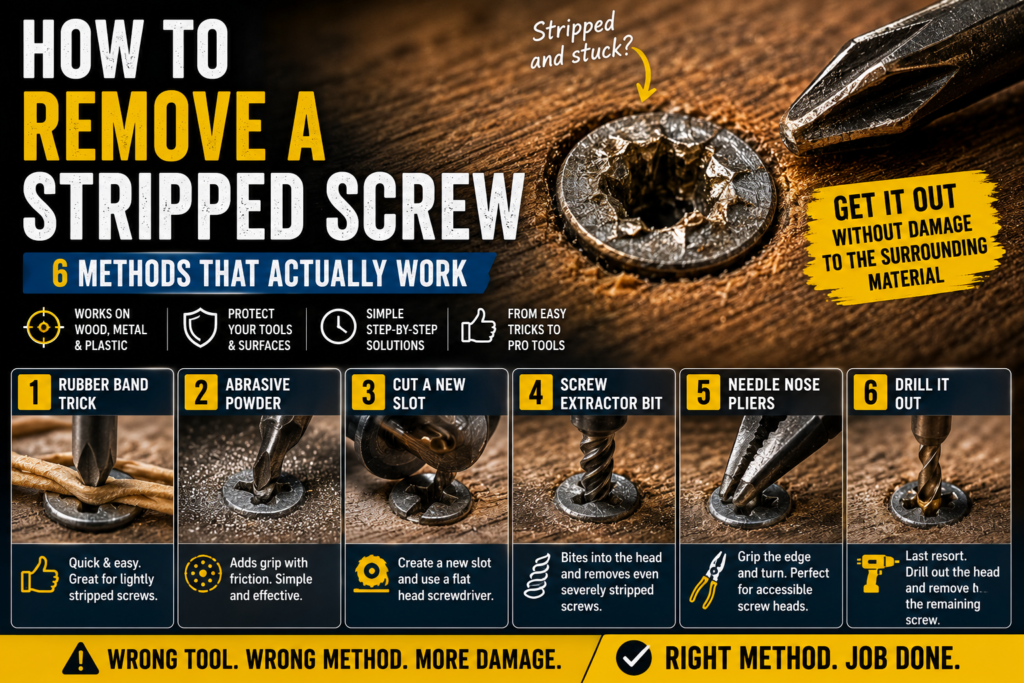
This guide covers six proven methods for removing stripped screws, ranked from easiest to most involved. Start with Method 1 and work down the list — most stripped screws come out with the first two or three methods without needing specialist tools.
Why Screws Get Stripped
Understanding why stripping happens helps prevent it in future. The three main causes are:
- Wrong bit size — a PH2 bit in a PH1 screw head, or a PZ2 in a PH2. Even a small size mismatch causes the driver to cam out under load, rounding the drive recess.
- Worn or damaged bits — a bit that has lost its sharp edges cannot grip the screw head properly. Drive bits are consumable items and need replacing regularly.
- Too much speed, not enough pressure — driving at high speed without pressing the driver firmly into the head causes cam-out. The driver spins out of the recess before the screw has moved.
- Wrong driver type — using a Phillips driver on a Pozidriv screw (or vice versa) — they look similar but are not interchangeable. This is extremely common and causes immediate stripping.
Before You Start — Try the Simple Fix First
Before attempting any removal method, try this first: press the driver as hard as you can into the screw head — much harder than feels normal — and turn very slowly. Sometimes what appears to be a fully stripped screw still has enough metal in the recess to turn if the driver is seated deeply with maximum downward pressure. This works surprisingly often on lightly stripped screws and costs nothing to try.
How to Remove a Stripped Screw?
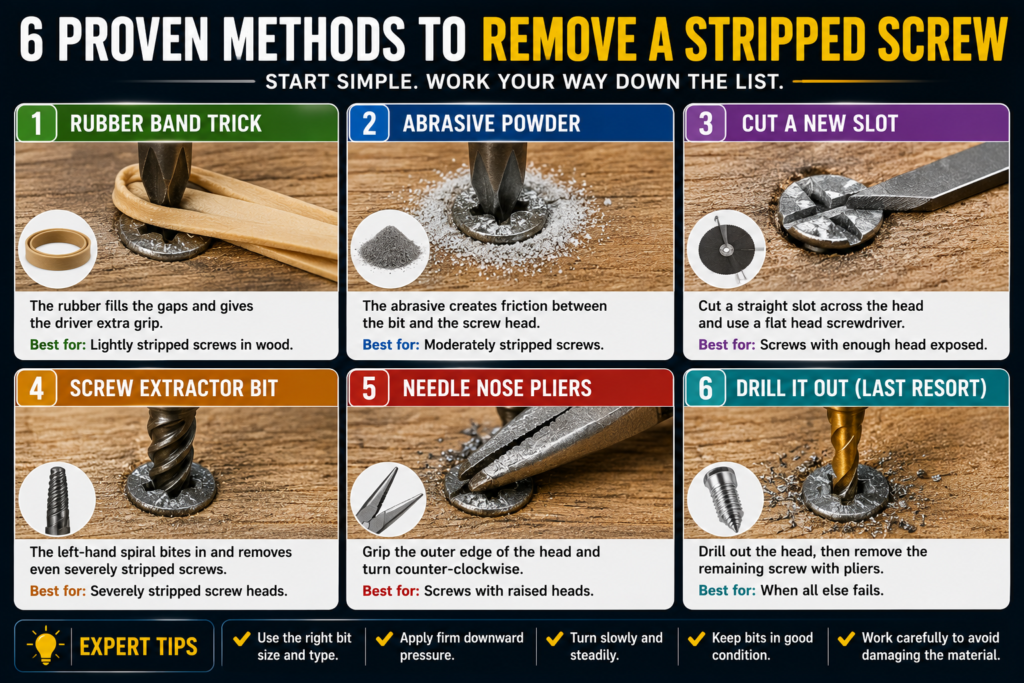
Method 1 — Rubber Band Trick (Easiest, No Tools Needed)
How it works
A wide rubber band placed between the driver and the screw head fills the gaps in the stripped recess, giving the driver something to grip against. The rubber deforms into the remaining metal and provides enough friction to turn the screw.
How to do it
- Place a wide rubber band flat over the screw head
- Press your driver through the rubber band into the screw recess
- Apply very firm downward pressure
- Turn slowly — do not rush or the rubber will tear
Best for
Lightly to moderately stripped screws in wood. Works best when some drive recess remains. Less effective on heavily stripped or corroded screws.
What you need
Any wide rubber band — the thick ones from broccoli bunches or postal deliveries work perfectly.
Method 2 — Abrasive Powder (Quick and Effective)
How it works
Fine abrasive powder — steel wool fibres, powdered abrasive cleaner, or even fine sand — placed in the screw recess creates friction between the driver and the remaining metal, allowing the driver to turn the screw without slipping.
How to do it
- Sprinkle a small amount of abrasive powder into the screw recess
- Press the driver firmly into the head
- Turn slowly with maximum downward pressure
Best for
Moderately stripped screws where the rubber band method did not work. Particularly effective combined with a manual screwdriver rather than a powered driver — the finer control helps.
Method 3 — Cut a New Slot (Flat Head Method)
How it works
Using a rotary tool (Dremel), angle grinder with a cutting disc, or a hacksaw, you cut a straight slot across the screw head. This gives a flat head screwdriver a fresh, undamaged surface to engage with — completely bypassing the stripped original recess.
How to do it
- Use a rotary tool with a cutting disc, or a hacksaw
- Cut a single straight slot across the diameter of the screw head — 2 to 3mm deep
- Insert a flat head screwdriver that fits the slot width
- Apply firm downward pressure and turn slowly
Best for
Screws with enough head protruding above the surface to cut a slot. Works on wood, metal, and most screw types. Not suitable for countersunk screws sitting flush with or below the surface.
What you need
Rotary tool with cutting disc, or hacksaw. A flat head screwdriver wide enough to fill the slot.
Method 4 — Screw Extractor Bit
How it works
Screw extractor bits (also called damaged screw remover bits) have a left-hand spiral flute that bites into the screw head when turned counter-clockwise. As you apply removal torque, the extractor bites deeper into the metal, gripping harder the more you turn — creating a self-tightening grip that removes even severely stripped screws.
How to do it
- Select an extractor bit slightly smaller than the screw head diameter
- Insert into your drill and set to reverse (counter-clockwise)
- Press the extractor firmly into the stripped screw head
- Start the drill slowly — the extractor will bite into the metal
- Continue turning slowly — the screw will begin to back out
Best for
Severely stripped screws where methods 1 through 3 have failed. Works on most screw sizes from No. 6 upwards. Extractor sets covering multiple sizes cost $10 to $25 and are worth keeping in any toolkit.
What you need
Screw extractor bit set — available from most hardware stores. A cordless drill set to reverse. For understanding the right drill settings for tasks like this, read our Torque vs Speed guide.
| Extractor size | Screw size range |
|---|---|
| No. 1 extractor | No. 6 to No. 8 screws |
| No. 2 extractor | No. 8 to No. 10 screws |
| No. 3 extractor | No. 10 to No. 14 screws |
| No. 4 extractor | No. 14 to 5/16 inch screws |
Method 5 — Locking Pliers (Grip and Turn)
How it works
If the screw head is protruding above the surface — even slightly — locking pliers (Mole grips / Vise-Grips) can clamp directly onto the screw head and provide enough rotational force to back it out. This completely bypasses the stripped drive recess.
How to do it
- Set the locking pliers to clamp tightly on the screw head diameter
- Lock them firmly onto the head — as tight as possible
- Turn counter-clockwise with a firm, steady motion
- Do not jerk — apply smooth rotational force
Best for
Screws with a head protruding at least 2 to 3mm above the surface. Very effective on screws in wood where the head has not been countersunk. Less effective on flush or countersunk heads where there is nothing for the pliers to grip.
What you need
Locking pliers (Mole grips or Vise-Grips) — one of the most useful general tools in any workshop. If you do not own a pair they are worth buying for this and many other tasks.
Method 6 — Drill Out the Screw Head (Last Resort)
How it works
When all other methods fail, you drill through the screw head using a metal drill bit. This separates the screw head from the shank, allowing the piece being held to be removed. The remaining shank stub in the material can then be removed with locking pliers (if protruding) or left in place if it causes no issue.
How to do it
- Select an HSS metal drill bit slightly smaller than the screw head diameter
- Centre punch the middle of the screw head to prevent bit wandering
- Drill through the screw head at low speed with cutting fluid on metal
- Once the head is separated, remove the piece being held
- Use locking pliers or a screw extractor to remove the remaining shank
Best for
Cases where the screw is so damaged that no other method works, or where the screw is corroded solid and will not turn regardless of grip. Destructive method — the screw is sacrificed but the surrounding material is preserved.
What you need
HSS metal drill bits — for guidance on the right type for your material read our Best Drill Bits for Metal guide. Cutting fluid. Centre punch. Locking pliers for the remaining shank.
Method Comparison Table
| Method | Tools needed | Difficulty | Best for | Damages screw? |
|---|---|---|---|---|
| 1. Rubber band | Rubber band only | Very easy | Lightly stripped | No |
| 2. Abrasive powder | Powder + driver | Easy | Moderately stripped | No |
| 3. Cut new slot | Rotary tool / hacksaw | Easy-medium | Protruding head | Modifies head |
| 4. Screw extractor | Extractor set + drill | Medium | Severely stripped | Yes — but removes it |
| 5. Locking pliers | Mole grips | Easy | Protruding head | Crushes head |
| 6. Drill out head | HSS drill bits + drill | Medium-hard | Last resort | Yes — destroys screw |
How to Prevent Stripping Screws in Future
- Use the correct bit size — match the bit exactly to the screw head size and type. A PH2 for Phillips No. 2, a PZ2 for Pozidriv No. 2. Never substitute.
- Replace worn bits regularly — drive bits are cheap. A worn bit strips screws. Replace any bit that shows visible wear on the tip edges.
- Apply downward pressure first, then turn — press the driver firmly into the head before applying rotational force. The pressure seats the driver correctly before turning begins.
- Use lower speed for driving — high speed is efficient for driving screws but gives you less control. For the final turns as the screw tightens, reduce speed significantly to avoid cam-out.
- Use an impact driver for long screws — an impact driver’s rotational impact mechanism is significantly less prone to cam-out than a smooth-rotation drill for driving long screws into hardwood. Read our Impact Driver vs Drill guide for a full comparison.
- Pre-drill hardwood — driving screws directly into hardwood without a pilot hole creates extreme resistance that causes cam-out. Always pilot drill hardwood before driving screws.
🔧 Which Method Should You Try? — Stripped Screw Selector
Answer three quick questions to find the best removal method for your specific situation.
How badly is the screw head stripped?
Where is the screw head?
What tools do you have?
Frequently Asked Questions
What is the easiest way to remove a stripped screw?
The rubber band method is the easiest and should always be tried first — it requires no tools beyond a rubber band and your existing screwdriver or drill bit. Place the rubber band between the driver and the screw head, apply maximum downward pressure, and turn slowly. It works surprisingly often on lightly to moderately stripped screws and takes under a minute to attempt.
What is a screw extractor and where do I buy one?
A screw extractor is a hardened steel bit with a reverse-spiral flute that bites into a damaged screw head when turned counter-clockwise. As you apply removal torque the extractor grips harder, creating a self-tightening hold. Sets of 5 to 6 extractors covering most common screw sizes are available at any hardware store for $10 to $25. Brands like Irwin, Alden, and DeWalt all make reliable extractor sets worth keeping permanently in your toolkit.
How do I remove a stripped screw that is flush with the surface?
Flush or countersunk stripped screws are the most difficult because locking pliers and the slot-cutting method both require a protruding head. Your best options in order: rubber band method first, then screw extractor (press it directly into the flush head at the centre), then carefully drilling out the head with a bit slightly smaller than the screw head diameter. For very stubborn flush screws a multi-out type extractor bit that works on both protruding and flush heads is worth buying specifically for this situation.
Can I prevent cam-out when driving screws with a drill?
Yes. Use the correct bit type and size, apply firm downward pressure before turning, reduce speed as the screw approaches full depth, and switch to an impact driver for long screws in hardwood where resistance is highest. An impact driver's rotational hammering mechanism is inherently less prone to cam-out than a smooth-rotation drill because each impact pulse drives the screw forward before the driver has a chance to spin out. Read our Impact Driver vs Drill guide for more detail.
What is the difference between Phillips and Pozidriv screws?
Phillips (PH) and Pozidriv (PZ) look almost identical at a glance but are not interchangeable. Pozidriv has additional radial lines between the main cross slots — look for four small tick marks at 45 degrees to the main cross. Using a Phillips driver in a Pozidriv screw (or vice versa) causes immediate cam-out and stripping. Check your screws carefully and use the matching driver type. Most modern European screws are Pozidriv. Most North American screws are Phillips.
The screw is rusted solid — will any of these methods work?
For corroded or rusted screws, apply penetrating oil (WD-40, PB Blaster, or similar) to the screw head and surrounding area. Leave it to penetrate for 15 to 30 minutes — or ideally overnight for heavily rusted fixings. The penetrating oil works into the thread interface and breaks down the rust bond. After soaking, try the rubber band method first. If the screw still will not move, the screw extractor method or drilling out the head are the most reliable options for fully seized screws.